Providing Data
See how to provide data with the Dataspace Connector.
The connector provides an endpoint for requesting its self-description. The self-description is returned as JSON-LD and contains several information about the running connector instance. This includes e.g. the title, the maintainer, the IDS Informodel version, and the resource catalog. At the public endpoint /, the resource catalog is not displayed. It can only be accessed with admin credentials at GET /api/connector or by sending an IDS description request message as explained here.

Step by Step
To understand the structure of a resource, please first take a look at the data model section and the REST API explanation. For adding resources to the running connector as a data provider, have a look at the following steps. How resources can be bootstrapped is explained here.
In the following example, we want to provide the raw data to a data consumer.
Step 1: Register Data Resources
The endpoint POST /api/offers can be used for registering a new resource offer at the connector. This can be done by providing information as metadata in JSON format. An example will be explained in the following.
curl -X 'POST' \
  'https://localhost:8080/api/offers' \
  -H 'accept: */*' \
  -H 'Content-Type: application/json' \
  -d '{
  "title": "Sample Resource",
  "description": "This is an example resource containing weather data.",
  "keywords": [
    "weather",
    "data",
    "sample"
  ],
  "paymentModality": "fixedPrice",
  "publisher": "https://openweathermap.org/",
  "language": "EN",
  "license": "http://opendatacommons.org/licenses/odbl/1.0/",
  "sovereign": "https://openweathermap.org/",
  "endpointDocumentation": "https://example.com",
  "key": "value",
  "samples": [
    "https://localhost:8080/api/offers/ca502fbc-bd65-4125-fbeb-97536647d623"
  ]
}'
The values title, description, keywords, publisher, sovereign, license, etc. describe the data resource and will be used to fill in the IDS Information Model attributes for IDS communication with a connector as data consumer.
New: You can add a payment modality to your resource (one of undefined, free, fixedPrice, or negotiationBasis). On top of that, you can add a list of resources as a sample of another resource. For this, add the IDs to the sample list. The connector checks if the values are valid uri and match known resource offers. If this is not the case, you will get a code 400 as a response.
To make the example listed above work, remove the list entry for the property samples or create a different ressource and use the respective URI for that sample.
Note: Be aware that the payment modality attribute has nothing to do with the contract negotiation. This has to be done no matter what modality is added to the resource. This is only for informative purpose.
Also, the sample feature is only for informative purpose. Handling out a contract agreement for a resource does not imply the automated negotiation for sample resources. To use the sample resource to provide “free” or “try out” example data, make sure that the sample resource has a usage policy without any restriction added.
Note: If you need any further attributes, feel free to just type custom key value pairs. They will be stored as additional inside the database - as shown in this example.
See the response of the previously registered resource below.
Response headers:
cache-control: no-cache,no-store,max-age=0,must-revalidate
 connection: keep-alive
 content-type: application/hal+json
 date: Mon,17 May 2021 17:16:53 GMT
 expires: 0
 keep-alive: timeout=60
 location: https://localhost:8080/api/offers/ca502fbc-fbeb-4125-bd65-97536647d623
 pragma: no-cache
 strict-transport-security: max-age=31536000 ; includeSubDomains
 transfer-encoding: chunked
 x-content-type-options: nosniff
 x-frame-options: DENY
 x-xss-protection: 1; mode=block
If the resource was successfully registered, the endpoint will respond with Http.CREATED and the locationfield of the created resource within the response header.
Response body:
{
  "creationDate": "2021-05-17T19:16:53.385+0200",
  "modificationDate": "2021-05-17T19:16:53.385+0200",
  "title": "Sample Resource",
  "description": "This is an example resource containing weather data.",
  "keywords": [
    "weather",
    "data",
    "sample"
  ],
  "publisher": "https://openweathermap.org/",
  "language": "EN",
  "license": "http://opendatacommons.org/licenses/odbl/1.0/",
  "version": 1,
  "sovereign": "https://openweathermap.org/",
  "endpointDocumentation": "https://example.com",
  "paymentModality": "fixedPrice",
  "samples": [
    "https://localhost:8080/api/offers/ca502fbc-bd65-4125-fbeb-97536647d623"
  ],
  "additional": {
    "key": "value"
  },
  "_links": {
    "self": {
      "href": "https://localhost:8080/api/offers/ca502fbc-fbeb-4125-bd65-97536647d623"
    },
    "contracts": {
      "href": "https://localhost:8080/api/offers/ca502fbc-fbeb-4125-bd65-97536647d623/contracts{?page,size,sort}",
      "templated": true
    },
    "representations": {
      "href": "https://localhost:8080/api/offers/ca502fbc-fbeb-4125-bd65-97536647d623/representations{?page,size,sort}",
      "templated": true
    },
    "catalogs": {
      "href": "https://localhost:8080/api/offers/ca502fbc-fbeb-4125-bd65-97536647d623/catalogs{?page,size,sort}",
      "templated": true
    },
    "subscriptions": {
      "href": "https://localhost:8080/api/offers/770138f0-3469-4dbd-bb56-8e5edbab987a/subscriptions{?page,size}",
      "templated": true
    },
    "brokers": {
      "href": "https://localhost:8080/api/offers/770138f0-3469-4dbd-bb56-8e5edbab987a/brokers{?page,size}",
      "templated": true
    }
  }
}
Apart from the metadata, the response body contains links to further points of interest, such as itself, its parents, etc. A version number is generated automatically and is increased with every entity change, as well as the creation and modification date.
The endpoints PUT, GET, andDELETE /offers/{id} provide standard CRUD functions to read, update, and delete the metadata, respectively the data resource - as described here.
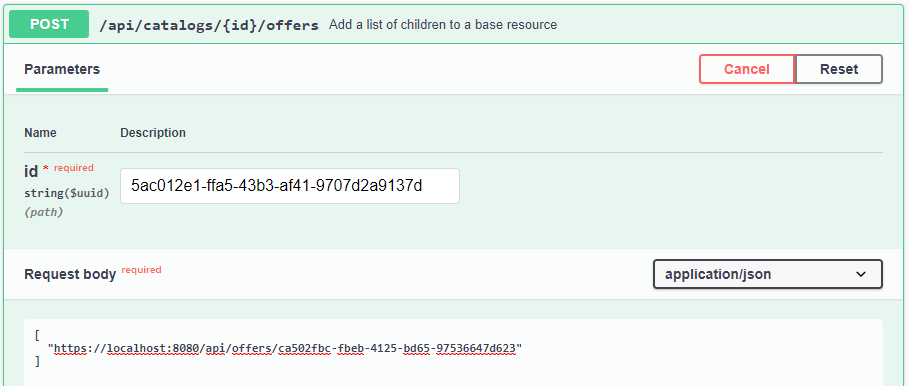
Next to the resource, we need a catalog as a parent for the offer. Use POST /api/catalogs to create one as shown in the following screenshot. The self-reference in the link property of the response will tell you the assigned identifier used in the next step.

curl -X 'POST' \
  'https://localhost:8080/api/catalogs' \
  -H 'accept: */*' \
  -H 'Content-Type: application/json' \
  -d '{
  "title": "Example Catalog",
  "description": "This catalog is used in the connector tutorial."
}'
Then, we need to link both objects to each other via another endpoint. Therefore, we execute a POST catalog’s id extended by /offers and the resource’s id as part of the list in the request body.

curl -X 'POST' \
  'https://localhost:8080/api/catalogs/<ID of the created catalog>/offers' \
  -H 'accept: */*' \
  -H 'Content-Type: application/json' \
  -d '[
  "https://localhost:8080/api/offers/<ID of the created ressource>/offer>"
]'
As stated here, an offered resource is only complete if it contains at least one contract offer and at least one representation with at least one artifact. Otherwise, it will not be listed in the IDS self-description because there is no complete data offer.
Next, create a contract and one rule, that you add to the contract. The rule is the object, that contains the usage policy as value. Since the IDS Usage Control Language is rather complicated and it is not trivial to manually create a valid policy, endpoints are provided to obtain example policies (POST /api/examples/policy) or to validate created and modified usage policies (POST /api/examples/validation). How these can be used, is explained here.

By adding multiple rules to one contract offer, you are now able to add multiple usage policies to one resource (e.g. the data usage can be logged and the data should be deleted at a given date).
Note: If you preset the consumer attribute, the connector will compare this with the issuerConnector of an incoming contract request. If both values do not match, the contract request will be rejected. Make sure that these values are equal (e.g. https://github.com != https://github.com/. On top of that, you have to predefine the start and end date. These values will also be checked on an incoming contract request.
Step 2: Add data
Option 1: Add Local Data
After we created a contract offer and a resource offer and added the latter to a catalog, we have to create a representation and add it to the resource offer. Then, we have to create an artifact and add it to the representation.
Within the artifact, you can specify whether you want to provide local data or remote data from an external API (see Step 3). For local data, you would have to add the following body to your POST request:
{
  "value": "Hello World"
}
Response body:
{
  "creationDate": "2021-05-17T19:40:37.375+0200",
  "modificationDate": "2021-05-17T19:40:37.375+0200",
  "remoteId": "genesis",
  "title": "",
  "numAccessed": 0,
  "byteSize": 32,
  "checkSum": 3110206735,
  "additional": {},
  "_links": {
    "self": {
      "href": "https://localhost:8080/api/artifacts/911a0451-f93f-4850-9dc7-e1a70060b2d1"
    },
    "data": {
      "href": "https://localhost:8080/api/artifacts/911a0451-f93f-4850-9dc7-e1a70060b2d1/data"
    },
    "representations": {
      "href": "https://localhost:8080/api/artifacts/911a0451-f93f-4850-9dc7-e1a70060b2d1/representations{?page,size,sort}",
      "templated": true
    },
    "agreements": {
      "href": "https://localhost:8080/api/artifacts/911a0451-f93f-4850-9dc7-e1a70060b2d1/agreements{?page,size,sort}",
      "templated": true
    },
    "subscriptions": {
      "href": "https://localhost:8080/api/artifacts/874df41f-babc-47a8-b926-095a10ef7f4b/subscriptions{?page,size}",
      "templated": true
    }
  }
}
In this case, the data will be stored within and loaded from the internal database.
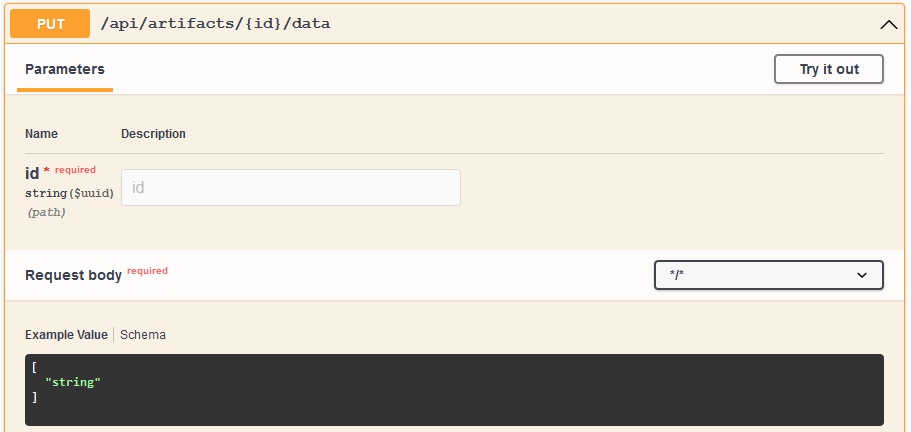
Another endpoint is provided to add data via PUT request.

Note: The Dataspace Connector automatically calculates the bytesize and checksum for local data.
Option 2: Add Remote Data
For remote data, as in this example, it is possible to set the attributes accessUrl, username, and password to define details for the data providing connector on how to retrieve the data from connected backend systems or existing APIs. You do not need to specify whether you added remote or local data. The Dataspace Connector automatically classifies an artifact as remote as soon as the accessUrl property is filled.
{
  "accessUrl": "https://samples.openweathermap.org/data/2.5/weather?lat=35&lon=139&appid=439d4b804bc8187953eb36d2a8c26a02"
}
Currently, the Dataspace Connector can natively establish a connection via http and https (optionally with basicAuth or apiKey). To use one of the authentications, just add the appropriate object to the body of your request.
Since version 7.x.x: To connect to other backends, you can define and use Camel routes as explained here.
Note: While the connector has the ability to store data internally, it never duplicates data connected by external systems into its internal memory. Instead, the data is only forwarded when a request is received. In addition, the backend connection credentials are never passed on to another connector, but are only used for internal data handling.
In case an external REST API should be connected and this API usually expects query parameters from the user, e.g. to retrieve the raw data in various formats, multiple artifacts can be created for one representation, or multiple artifacts with one representation each. Each artifact can then refer to one specified http request or database query with fix parameters.
If you want to leave it up to the consumer which part of the data should be retrieved, a reference to the OpenApi description of the connected REST Api as endpointDocumentation may be provided. This is useful, for example, if the connected API is a generic Linked Data Platform. The consumer can then pass request parameters when retrieving data, which are automatically resolved at the Dataspace Connector to the provider backend.
Step 4: Publish Resources at an IDS Broker (optional)
For communicating with an IDS metadata broker, some endpoints are provided. For a detailed description, see here.
Policy Enforcement
When the data provider receives an ArtifactRequestMessage from an external connector, the ArtifactMessageHandler iterates through all contracts of a resource offer and all of its rules to check the policy pattern. If the pattern matches one of the following five, an appropriate policy check is performed:PROVIDE_ACCESS, PROHIBIT_ACCESS, USAGE_DURING_INTERVAL, USAGE_UNTIL_DELETION, CONNECTOR_RESTRICTED_USAGE, and SECURITY_PROFILE_RESTRICTED_USAGE.
Depending on the specified rules, the access permission will be set to true or false. If it is true, the data provider returns the data. If not, it will respond with a RejectionReason.NOT_AUTHORIZED.
Note: The contract negotiation is enabled by default. To disable it, have a look at the configurations.
Resource Updates
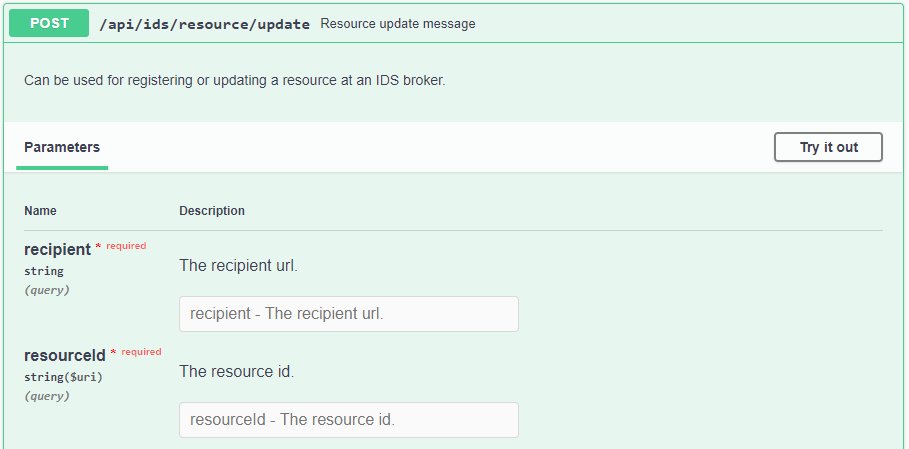
If your setup or use case does not covers a consumer subscribing to a resource offer, you can trigger the sending of ResourceUpdateMessages manually by using the respective endpoint.

How subscriptions can be used, is described here.